Your stove isn’t just a hunk of metal with knobs. It’s the heart of countless Sunday roasts, birthday cakes, and midnight snacks. And just like any well-used kitchen tool, it needs a bit of TLC to keep performing at its best.
A clean oven keeps your kitchen feeling fresh and your dinners free from that burnt, bitter note nobody wants. So, want to know how to get it sparkling and ready for every cooking occasion? Here’s how.
Gather Your Cleaning Supplies
Nothing slows down an oven cleanup like realising halfway through that you’ve forgotten the vinegar or left the microfibre cloths in the laundry. Save yourself the mid-clean dash by gathering everything you need before you start.
Your go-to kit should include:
- Baking soda;
- White vinegar;
- A spray bottle;
- Soft cleaning cloths;
- A small-bristled brush.
Opt for natural products when you can. They’re better for your health, kinder to the environment, and still tough on grime. If you must use a stronger commercial cleaner, add some protective gloves to keep your skin safe.
Having all your tools lined up at the start keeps things moving without any awkward pauses, so you can clean efficiently and finish faster.
Prepare the Oven for Cleaning
Before you dive in, make sure your oven is switched off and completely cool. This isn’t just to avoid burning your fingers. Heat can make some cleaning pastes less effective, and you don’t want to risk damaging delicate parts.
Once it’s safe to touch, slide out the oven racks and any removable trays or side supports. Set them aside for a proper clean later.
It’s advisable to line the countertops or floors with some old newspapers before pulling things out. It will catch any crumbs or rogue bits of charred food that have been hanging around since last year’s Christmas roast.
Next, grab a slightly damp cloth and give the interior a quick once-over, just enough to clear away loose crumbs and dust. You should also pay special attention to the corners, since it’s where grease loves to hide.
If you want to make your life easier later on, leave the oven door ajar during cleaning. A little airflow can help dry things out faster and keep any residual smells from getting trapped inside.
Create a Natural Cleaning Solution
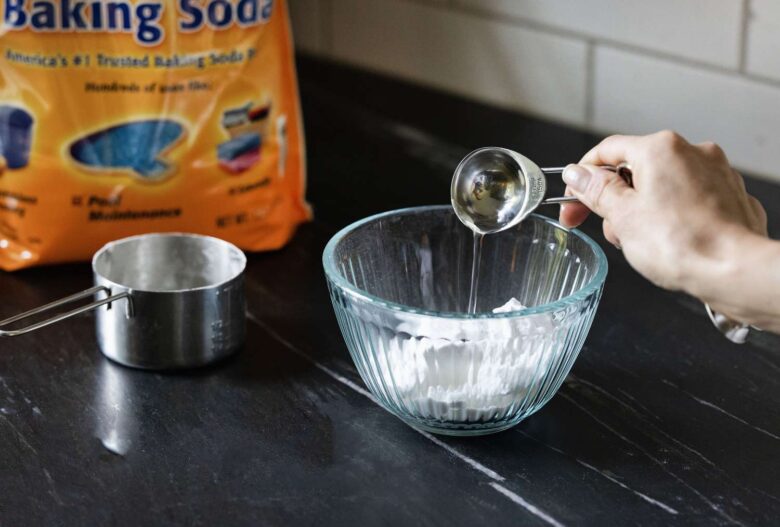
There’s no need to race off to Bunnings for fancy sprays. Your next great cleaner is probably sitting in your pantry.
Good old bicarbonate of soda is a real hero. It’s gentle on your oven, tough on grime, and won’t leave your kitchen smelling like a chem lab.
Mix half a cup of bicarb with just enough water to make a thick paste, more like toothpaste than soup. Spread it over the inside of your oven and steer clear of any delicate elements or fans. For spills that have overstayed their welcome, give them a little extra paste.
If you want to step things up, fill a spray bottle with white vinegar. Once the bicarb paste is on, give it a light spray with vinegar to help it do its job. This same trick works wonders on BBQ plates and oven trays.
Let the paste sit for at least 30 minutes to reach the roots of the problem, or leave it overnight if you’ve got time. By morning, you’ll be ready for the fun part, when everything sparkles and shines again.
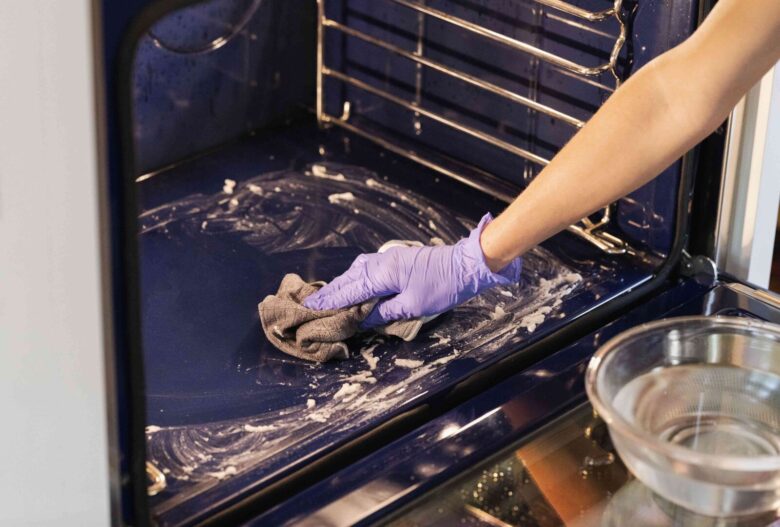
Scrub and Wipe Down the Oven
Once the paste has done its job, wipe it away with a damp cloth to start revealing a cleaner surface. Make sure to change the cloth regularly to make sure you’re lifting the grime, not smearing it.
For any stubborn spots, bring in a soft-bristled brush or an old toothbrush. A light touch is all you need, since you’re only coaxing the gunk off.
If you’ve left the paste overnight, most of the work will already be done for you. Still, make sure to remove every trace of bicarb so you don’t get any chalky surprises in your next tray of Anzac biscuits.
Once the surfaces are clean, give them a quick once-over with a dry cloth to add a bit of polish. It’s a finishing touch that makes the oven look well cared for and ready to back you up for your next culinary masterpiece.
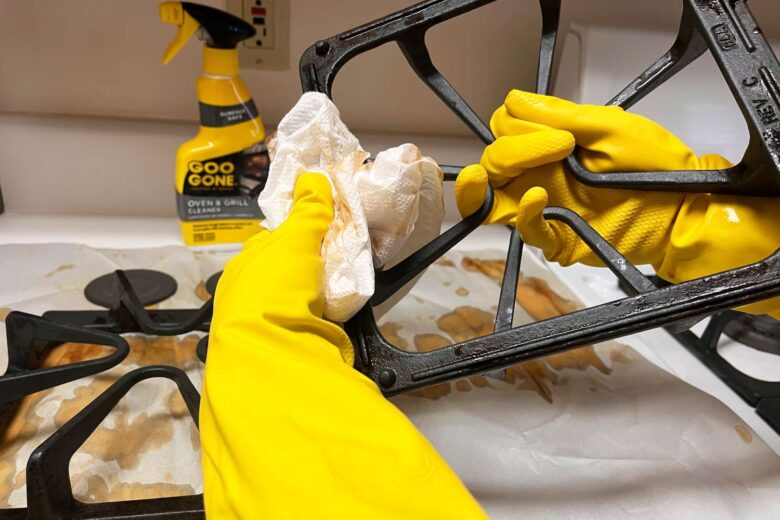
Clean the Oven Racks Separately

Some parts of your stove deserve a bit more attention. Start by filling a tub with hot water and a generous squeeze of dishwashing liquid. Let the metal soak for around 30 minutes so stubborn grease starts to loosen.
Once the soaking is done, take a soft-bristled brush or non-scratch sponge and work your way over every surface, paying extra attention to the hard-to-reach corners where grease and debris accumulate.
Rinse everything well under clean water, then dry thoroughly with a tea towel. Even a few stray droplets can lead to rust over time.
Reassemble the Oven
It’s time to bring your oven back to life. Slide everything into place, making sure that no stray bicarb paste is lurking in the corners.
For a final flourish, give the oven door a quick once-over with glass cleaner or a vinegar spritz, then wipe down the exterior to banish any fingerprints or cooking smudges. It’s a small touch that keeps your kitchen looking as good as the meals coming out of it.
If the idea of scrubbing still makes you want to put the kettle on and forget the whole thing, call in the experts.
An oven and BBQ cleaning service can work wonders. They come armed with the right gear to have your appliance looking and performing as if it came straight out of the showroom..
Conclusion
A clean oven isn’t just easier on the eyes. It cooks more evenly, smells better, and makes your time in the kitchen that much more enjoyable.
A little attention now saves you a heap of trouble later. Keep at it, and your appliance will reward you with years of faithful service and meals worth bragging about.
And if life gets busy or you’d rather keep your weekends free for barbies and beach days, professional cleaners are ready to take the job off your plate. They’ll do the elbow work so you can get back to what matters — cooking, eating, and enjoying life.