One of the most common issues people nowadays face is stiffness and pain in their lower back. Pain in the lower back area is most commonly caused by lack of activity or bad sitting position. When you think about the amount of time we spend in our houses, sitting in front of a computer, working or just passing time, it’s easy to see how this problem is affecting more and more people every day.
Because of this, we’ve set out to do a little bit of research and find out what you can do to help ease the lower back pain or even prevent it in some cases. What we found out is that stretching is arguably the best way to ease the pain. With that in mind, here are some of the best ways to stretch your lower back.
1. Child’s Pose
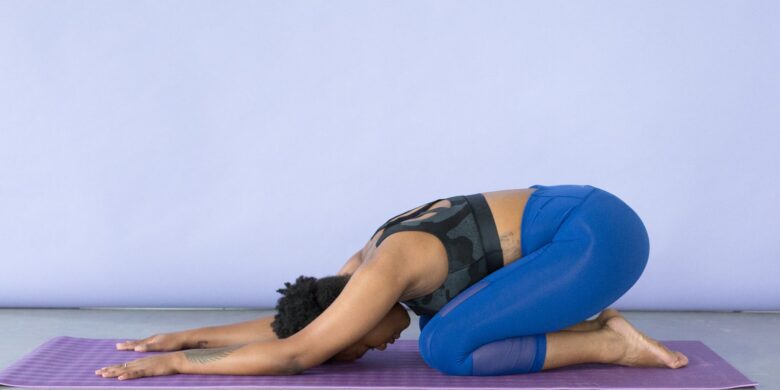
One thing you’re going to notice is that most of the stretches and exercises on this list are beginner-level yoga poses, so if you were worried you wouldn’t be able to do some of these – you don’t have to be.
The first stretch we’re going to talk about is the Child’s pose or Balasana – a common yoga pose that everyone can easily do in their home. You’ll want to start by going down on your knees. You’ll open on the knees slightly wider than your shoulders while keeping the feet close together. Once you do that, you’ll lower your bottom onto your feet and lower your body towards the ground. Ideally, you’ll want to keep your back straight as possible while extending your arms as far as you can and have your forehead touch the ground. If you can’t do this on your first try – don’t worry you’ll get there. You’ll feel the lower back stretching as soon as you touch the ground. Keep this pose for 20 seconds in the beginning and work your way up as you progress.
2. Cat/Cow Stretch
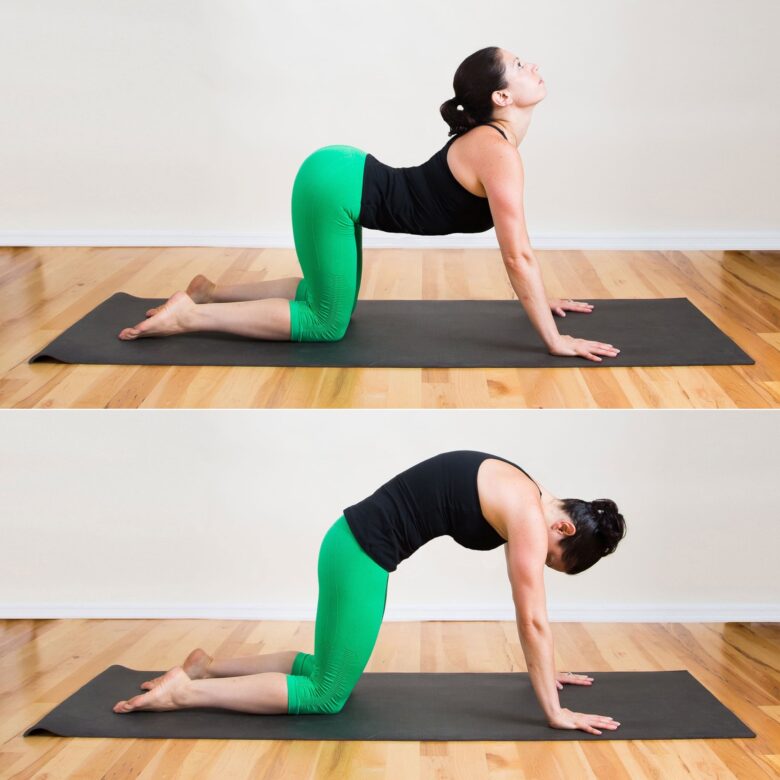
Next, up on our list, we have the Cat/Cow pose or Marjaryasana/Bitilasana pose. This stretch is a combination of two fundamental yoga positions that will relax all of your back muscles. You’ll want to begin in a tabletop position or down-on-all-fours if you prefer. Start with your hands directly under your shoulders and knees under the hips and keep the back straight. From there, you’ll want to gently move between the two poses. First up, you’ll want to arch your back outwards, as a cat would. Hold the position for about 5 seconds then gently move your body in the opposite direction, meaning lowering the middle of your torso. Gently alternate between these positions for about half a minute.
3. Let The Gravity Do The Trick
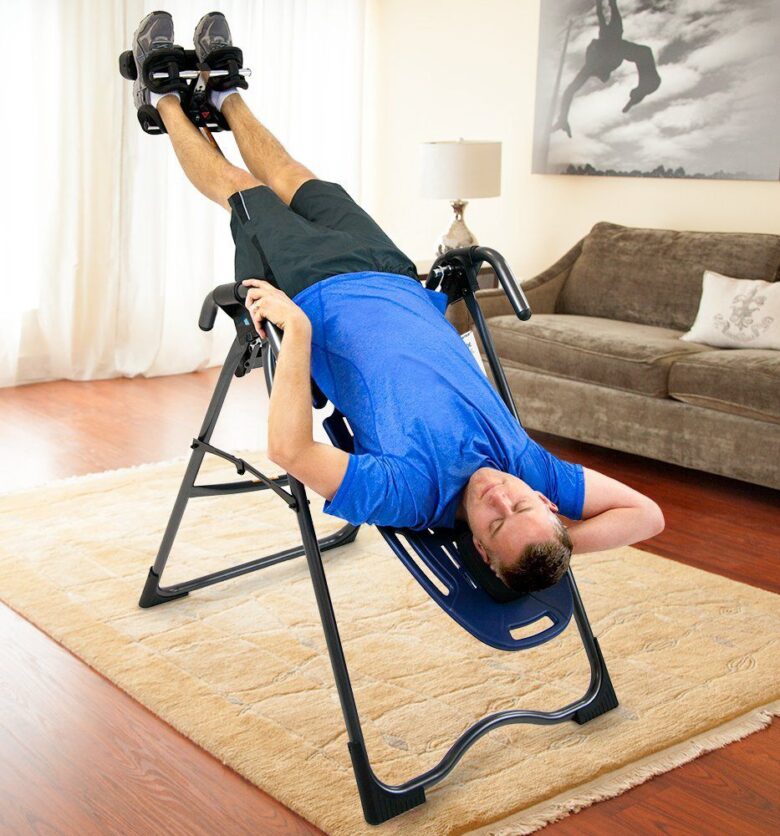
How would you feel if we were to tell you could simply lay down and stretch your back? That would be great, wouldn’t it? Well, even though it may sound impossible, that’s not the case. You see, our lower back gets stiff and compressed under our weight. To allow them to extend, all we would have to do is suspend ourselves from our feet and let gravity do the trick. Since hanging upside down isn’t as easy as it sounds and it can potentially be dangerous, we wouldn’t advise you to just hang off of a pull-up bar.
Instead, you could use an inversion table. Inversion tables are simple devices that allow you to just lie down and let gravity pull you in the other direction, thus extending your muscles. Now, considering there are still some potential injury risks, we’d advise you not to get just any inversion table, but try and look for a well-built, secure one. If you wish, you can click here and begin your search.
4. Supine Twist
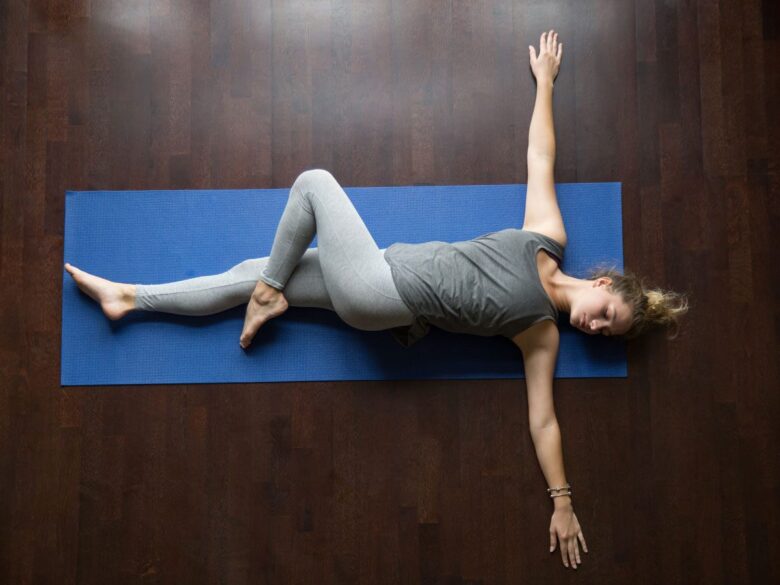
For those willing to put in a little bit of effort, we have Supta Matsyendrasana or Supine Twist. This simple stretch will not only benefit your back but your glutes, abdomen and shoulders as well. You’ll want to begin lying straight on your back with arms wide open and shoulders on the ground – a T position if you will. From there, you’ll want to bend one of the legs and gently rotate it over your other leg in the opposite direction. While rotating your knee, let’s say to the left, you’ll want to rotate your head to the right while keeping both shoulders on the ground Stay in this position for about 20 seconds. This will allow you to properly stretch pretty much your whole body, but mostly your lower back. Ideally, you’ll want your knee to touch the ground, but as we’ve said, reaching the perfect from takes some time, so just take it slow.
5. Knee-To-Chest
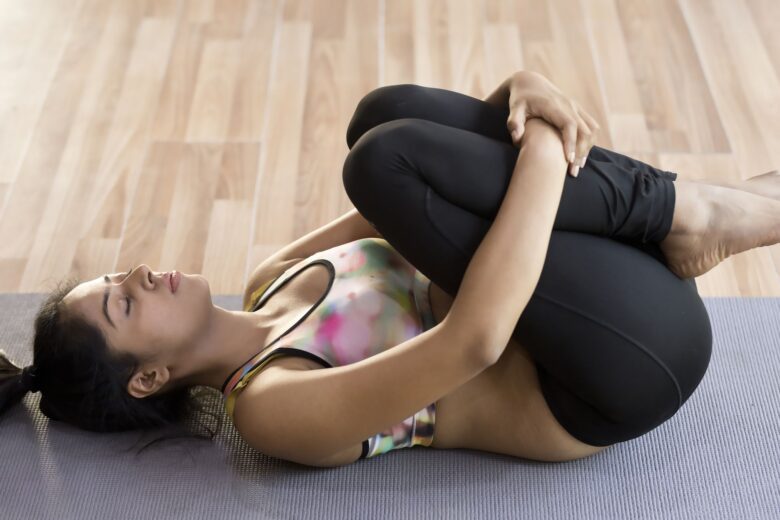
Similarly to the others, this pose extends your contracted lower back muscles. Apanasana is one of the easiest poses for beginners because you can use your arms to help stretch on the lower back. You’ll start by lying straight on your back with your knees bent and feet flat and the ground. From there, you’ll begin by hugging your knees and gently bringing them towards your chest. You’ll want to keep your lower back straight on the ground, so don’t arch your back only to touch your chest with your knees as that will defeat the purpose of this stretch. Just like it was the case with the other poses from our list, you’ll want to stay in this one for about 20 to 30 seconds. Pro tip – if you wish, you can gently rock from side to side and massage your lower back as you’re stretching it.
6. Cobra Pose
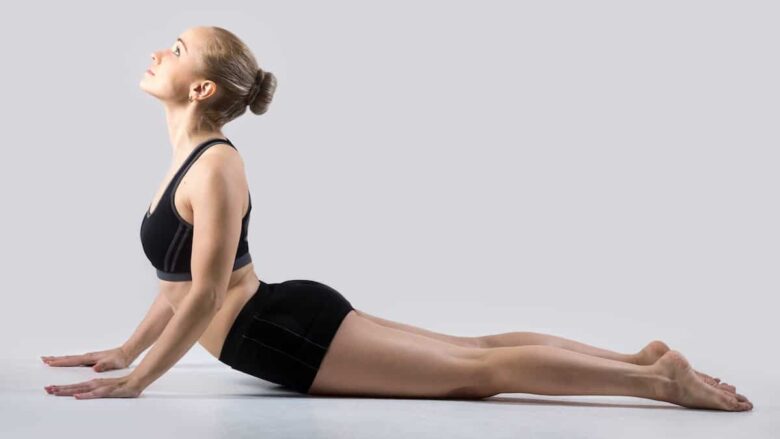
For our final pick, we have Bhujangasana or the Cobra pose. This simple stretch will allow you to ease the pain by stretching your lower back, your abdomen and pretty much all of the upper body as well. You’ll start flat on your belly, with your hands placed beside your ribcage. You want to start by pressing your feet into the ground and rotating your inner thighs upwards, to activate your lower back. Once you do that, use your hands to raise your torso off the ground while keeping the pelvis grounded. You should only extend your arms for as long as it feels comfortable. Hold the pose for about 10-15 seconds and then slowly come back down.
Of course, there are other ways to stretch your lower back, but we feel these are the easiest to do. Once you get comfortable, you can try some new thing out and maybe share them with us later on. Hopefully, we’ve been helpful. Take care.


